
Seafoam Islands 1f
Walk · Lv. 30 · 15%
Walk · Lv. 28 · 4%
 Artwork unavailable
Main-series regional Pokédexes only. DLC and local Pokédexes are nested beneath their parent region.
Native encounter and acquisition records are organized in release order. Downloadable expansions are nested beneath the base game that is required to use them. Transfer-only compatibility and untracked side games are intentionally excluded.
Walk · Lv. 30 · 15%
Walk · Lv. 28 · 4%
Walk · Lv. 32 · 15%
Walk · Lv. 28 · 5%
Walk · Lv. 31 · 10%
Walk · Lv. 29 · 5%
Super Rod · Lv. 15 · 17%
Super Rod · Lv. 15 · 8%
Walk · Lv. 31 · 20%
Walk · Lv. 33 · 10%
Super Rod · Lv. 15 · 17%
Super Rod · Lv. 15 · 8%
Super Rod · Lv. 15 · 17%
Super Rod · Lv. 15 · 8%
Super Rod · Lv. 15 · 17%
Super Rod · Lv. 15 · 8%
Super Rod · Lv. 15 · 17%
Super Rod · Lv. 15 · 8%
Super Rod · Lv. 15 · 17%
Super Rod · Lv. 15 · 8%
Super Rod · Lv. 15 · 25%
Super Rod · Lv. 15 · 17%
Super Rod · Lv. 15 · 8%
Super Rod · Lv. 15 · 25%
Super Rod · Lv. 15 · 17%
Super Rod · Lv. 15 · 8%
Super Rod · Lv. 15 · 25%
Super Rod · Lv. 15 · 17%
Super Rod · Lv. 15 · 8%
Super Rod · Lv. 15 · 17%
Super Rod · Lv. 15 · 8%
Super Rod · Lv. 15 · 25%
Walk · Lv. 30 · 20%
Walk · Lv. 30 · 10%
Super Rod · Lv. 15 · 17%
Super Rod · Lv. 15 · 8%
Super Rod · Lv. 15 · 17%
Super Rod · Lv. 15 · 8%
Super Rod · Lv. 15 · 17%
Super Rod · Lv. 15 · 8%
Super Rod · Lv. 15 · 17%
Super Rod · Lv. 15 · 8%
Super Rod · Lv. 15 · 17%
Super Rod · Lv. 15 · 8%
Super Rod · Lv. 15 · 17%
Super Rod · Lv. 15 · 8%
Super Rod · Lv. 15 · 25%
Super Rod · Lv. 15 · 17%
Super Rod · Lv. 15 · 8%
Super Rod · Lv. 15 · 25%
Super Rod · Lv. 15 · 17%
Super Rod · Lv. 15 · 8%
Super Rod · Lv. 15 · 25%
Super Rod · Lv. 15 · 17%
Super Rod · Lv. 15 · 8%
Super Rod · Lv. 15 · 17%
Super Rod · Lv. 15 · 8%
Super Rod · Lv. 15 · 25%
Super Rod · Lv. 25 · 20%
Super Rod · Lv. 35 · 10%
Super Rod · Lv. 20 · 30%
Super Rod · Lv. 30 · 20%
Super Rod · Lv. 40 · 10%
Super Rod · Lv. 10 · 10%
Good Rod · Lv. 20 · 10%
Super Rod · Lv. 40 · 30%
Good Rod · Lv. 20 · 10%
Super Rod · Lv. 40 · 30%
Good Rod · Lv. 20 · 10%
Super Rod · Lv. 40 · 30%
Good Rod · Lv. 20 · 10%
Super Rod · Lv. 40 · 30%
Good Rod · Lv. 20 · 10%
Super Rod · Lv. 40 · 30%
Good Rod · Lv. 20 · 10%
Super Rod · Lv. 40 · 30%
Good Rod · Lv. 20 · 10%
Super Rod · Lv. 40 · 30%
Good Rod · Lv. 20 · 10%
Super Rod · Lv. 40 · 30%
Good Rod · Lv. 20 · 10%
Super Rod · Lv. 40 · 30%
Good Rod · Lv. 20 · 10%
Super Rod · Lv. 40 · 30%
Good Rod · Lv. 20 · 10%
Super Rod · Lv. 40 · 30%
Good Rod · Lv. 20 · 10%
Super Rod · Lv. 40 · 30%
Good Rod · Lv. 20 · 10%
Super Rod · Lv. 40 · 30%
Good Rod · Lv. 20 · 10%
Super Rod · Lv. 40 · 30%
Good Rod · Lv. 20 · 10%
Super Rod · Lv. 40 · 30%
Good Rod · Lv. 20 · 10%
Super Rod · Lv. 40 · 30%
Good Rod · Lv. 20 · 10%
Super Rod · Lv. 40 · 30%
Good Rod · Lv. 20 · 10%
Super Rod · Lv. 40 · 30%
Good Rod · Lv. 20 · 10%
Super Rod · Lv. 40 · 30%
Good Rod · Lv. 20 · 10%
Super Rod · Lv. 40 · 30%
Good Rod · Lv. 20 · 10%
Super Rod · Lv. 40 · 30%
Good Rod · Lv. 20 · 10%
Super Rod · Lv. 40 · 30%
Good Rod · Lv. 20 · 10%
Super Rod · Lv. 40 · 30%
Good Rod · Lv. 20 · 10%
Super Rod · Lv. 40 · 30%
Good Rod · Lv. 20 · 10%
Super Rod · Lv. 40 · 30%
Good Rod · Lv. 20 · 10%
Super Rod · Lv. 40 · 30%
Good Rod · Lv. 20 · 10%
Super Rod · Lv. 40 · 30%
Good Rod · Lv. 20 · 10%
Super Rod · Lv. 40 · 30%
Good Rod · Lv. 20 · 10%
Super Rod · Lv. 40 · 30%
Good Rod · Lv. 20 · 10%
Super Rod · Lv. 40 · 30%
Super Rod · Lv. 15–25 · 40%
Super Rod · Lv. 15–25 · 40%
Super Rod · Lv. 15–25 · 40%
Super Rod · Lv. 15–25 · 40%
Super Rod · Lv. 15–25 · 40%
Super Rod · Lv. 15–25 · 40%
Super Rod · Lv. 15–25 · 40%
Super Rod · Lv. 20–40 · 15%
Super Rod · Lv. 20–40 · 15%
Super Rod · Lv. 20–40 · 15%
Super Rod · Lv. 20–40 · 15%
Super Rod · Lv. 20–40 · 15%
Super Rod · Lv. 20–40 · 15%
Super Rod · Lv. 20–50 · 15%
Super Rod · Lv. 20–50 · 15%
Super Rod · Lv. 20–50 · 15%
Good Rod · Lv. 20 · 10%
Super Rod · Lv. 40 · 30%
Good Rod · Lv. 20 · 10%
Super Rod · Lv. 40 · 30%
Good Rod · Lv. 20 · 10%
Super Rod · Lv. 40 · 30%
Good Rod · Lv. 20 · 10%
Super Rod · Lv. 40 · 30%
Good Rod · Lv. 20 · 10%
Super Rod · Lv. 40 · 30%
Good Rod · Lv. 20 · 10%
Super Rod · Lv. 40 · 30%
Good Rod · Lv. 20 · 10%
Super Rod · Lv. 40 · 30%
Good Rod · Lv. 20 · 10%
Super Rod · Lv. 40 · 30%
Good Rod · Lv. 20 · 10%
Super Rod · Lv. 40 · 30%
Good Rod · Lv. 20 · 10%
Super Rod · Lv. 40 · 30%
Good Rod · Lv. 20 · 10%
Super Rod · Lv. 40 · 30%
Good Rod · Lv. 20 · 10%
Super Rod · Lv. 40 · 30%
Good Rod · Lv. 20 · 10%
Super Rod · Lv. 40 · 30%
Good Rod · Lv. 20 · 10%
Super Rod · Lv. 40 · 30%
Good Rod · Lv. 20 · 10%
Super Rod · Lv. 40 · 30%
Good Rod · Lv. 20 · 10%
Super Rod · Lv. 40 · 30%
Good Rod · Lv. 20 · 10%
Super Rod · Lv. 40 · 30%
Good Rod · Lv. 20 · 10%
Super Rod · Lv. 40 · 30%
Good Rod · Lv. 20 · 10%
Super Rod · Lv. 40 · 30%
Good Rod · Lv. 20 · 10%
Super Rod · Lv. 40 · 30%
Good Rod · Lv. 20 · 10%
Super Rod · Lv. 40 · 30%
Good Rod · Lv. 20 · 10%
Super Rod · Lv. 40 · 30%
Super Rod · Lv. 35–55 · 40%
Super Rod Spots · Lv. 35–60 · 40%
Super Rod · Lv. 35–55 · 40%
Super Rod Spots · Lv. 35–60 · 40%
Super Rod · Lv. 35–55 · 40%
Super Rod Spots · Lv. 35–60 · 40%
Super Rod · Lv. 35–55 · 40%
Super Rod Spots · Lv. 35–60 · 40%
Super Rod · Lv. 35–55 · 40%
Super Rod Spots · Lv. 35–60 · 40%
Super Rod · Lv. 35–55 · 40%
Super Rod Spots · Lv. 35–60 · 40%
Super Rod · Lv. 40–60 · 40%
Super Rod Spots · Lv. 40–60 · 40%
Super Rod Spots · Lv. 50–70 · 15%
Super Rod · Lv. 40–60 · 40%
Super Rod Spots · Lv. 40–60 · 40%
Super Rod Spots · Lv. 50–70 · 15%
Super Rod · Lv. 40–60 · 40%
Super Rod Spots · Lv. 40–60 · 40%
Super Rod Spots · Lv. 50–70 · 15%
Super Rod · Lv. 40–60 · 40%
Super Rod Spots · Lv. 40–60 · 40%
Super Rod Spots · Lv. 50–70 · 15%
Super Rod · Lv. 40–60 · 40%
Super Rod Spots · Lv. 40–60 · 40%
Super Rod Spots · Lv. 50–70 · 15%
Super Rod · Lv. 40–60 · 40%
Super Rod Spots · Lv. 40–60 · 40%
Super Rod Spots · Lv. 50–70 · 15%
Super Rod · Lv. 40–60 · 40%
Super Rod Spots · Lv. 40–60 · 40%
Super Rod Spots · Lv. 50–70 · 15%
Super Rod · Lv. 40–60 · 40%
Super Rod Spots · Lv. 40–60 · 40%
Super Rod Spots · Lv. 50–70 · 15%
Good Rod · Lv. 25 · 35%
Super Rod · Lv. 10–15 · 1%
Bubbling Spots · Lv. 10–15 · 20%
Gift · Lv. 37–43 · 5%
Gift · Lv. 21–27 · 6%
Gift · Lv. 49–55 · 4%
Super Rod · Lv. 10–15 · 1%
Bubbling Spots · Lv. 10–15 · 20%
Gift · Lv. 37–43 · 5%
Gift · Lv. 21–27 · 6%
Gift · Lv. 49–55 · 4%
Bubbling Spots · Lv. 10–22 · 35%
Super Rod · Lv. 10–17 · 5%
Bubbling Spots · Lv. 10–22 · 35%
Super Rod · Lv. 10–17 · 5%
Overworld Water · Lv. 39–44 · 100%
Overworld Water · Lv. 39–44 · 100%
Overworld Water · Lv. 39–44 · 100%
Overworld Water · Lv. 39–44 · 100%
Overworld Water · Lv. 40–43 · 5%
Overworld Water · Lv. 60 · 5%
Overworld Water · Lv. 40–43 · 10%
Overworld Water · Lv. 60 · 10%
Bubbling Spots · Lv. 8–12 · 20%
Bubbling Spots · Lv. 60 · 20%
Overworld Water · Lv. 40–43 · 15%
Overworld Water · Lv. 60 · 15%
Overworld Water · Lv. 40–43 · 45%
Overworld Water · Lv. 60 · 45%
Overworld Water · Lv. 40–43 · 20%
Overworld Water · Lv. 60 · 20%
Overworld Water · Lv. 40–43 · 30%
Overworld Water · Lv. 60 · 30%
Bubbling Spots · Lv. 30–35 · 60%
Bubbling Spots · Lv. 60 · 60%
Overworld Water · Lv. 38–40 · 25%
Overworld Water · Lv. 60 · 25%
Max Raid · Lv. 25–30 · 20%
Max Raid · Lv. 25–30 · 20%
Max Raid · Lv. 25–30 · 20%
Max Raid · Lv. 15–20 · 35%
Max Raid · Lv. 15–20 · 35%
Max Raid · Lv. 15–20 · 35%
Max Raid · Lv. 15–20 · 35%
Max Raid · Lv. 25–30 · 20%
Overworld Water · Lv. 40–43 · 5%
Overworld Water · Lv. 60 · 5%
Overworld Water · Lv. 40–43 · 10%
Overworld Water · Lv. 60 · 10%
Bubbling Spots · Lv. 8–12 · 20%
Bubbling Spots · Lv. 60 · 20%
Overworld Water · Lv. 40–43 · 15%
Overworld Water · Lv. 60 · 15%
Overworld Water · Lv. 40–43 · 45%
Overworld Water · Lv. 60 · 45%
Overworld Water · Lv. 40–43 · 20%
Overworld Water · Lv. 60 · 20%
Overworld Water · Lv. 40–43 · 30%
Overworld Water · Lv. 60 · 30%
Bubbling Spots · Lv. 30–35 · 60%
Bubbling Spots · Lv. 60 · 60%
Overworld Water · Lv. 38–40 · 25%
Overworld Water · Lv. 60 · 25%
Max Raid · Lv. 25–30 · 20%
Max Raid · Lv. 25–30 · 20%
Max Raid · Lv. 25–30 · 20%
Max Raid · Lv. 15–20 · 35%
Max Raid · Lv. 15–20 · 35%
Max Raid · Lv. 15–20 · 35%
Max Raid · Lv. 15–20 · 35%
Max Raid · Lv. 25–30 · 20%
Bubbling Spots · Lv. 16–21 · 40%
Bubbling Spots · Lv. 60 · 40%
Bubbling Spots · Lv. 19–24 · 40%
Bubbling Spots · Lv. 60 · 40%
Max Raid · Lv. 15–20 · 60%
Max Raid · Lv. 25–30 · 30%
Max Raid · Lv. 15–20 · 60%
Max Raid · Lv. 25–30 · 30%
Max Raid · Lv. 15–20 · 60%
Max Raid · Lv. 25–30 · 30%
Max Raid · Lv. 25–30 · 20%
Max Raid · Lv. 35–40 · 25%
Max Raid · Lv. 25–30 · 20%
Max Raid · Lv. 35–40 · 25%
Bubbling Spots · Lv. 16–21 · 40%
Bubbling Spots · Lv. 60 · 40%
Bubbling Spots · Lv. 19–24 · 40%
Bubbling Spots · Lv. 60 · 40%
Max Raid · Lv. 15–20 · 60%
Max Raid · Lv. 25–30 · 30%
Max Raid · Lv. 15–20 · 60%
Max Raid · Lv. 25–30 · 30%
Max Raid · Lv. 15–20 · 60%
Max Raid · Lv. 25–30 · 30%
Max Raid · Lv. 25–30 · 20%
Max Raid · Lv. 35–40 · 25%
Max Raid · Lv. 25–30 · 20%
Max Raid · Lv. 35–40 · 25%
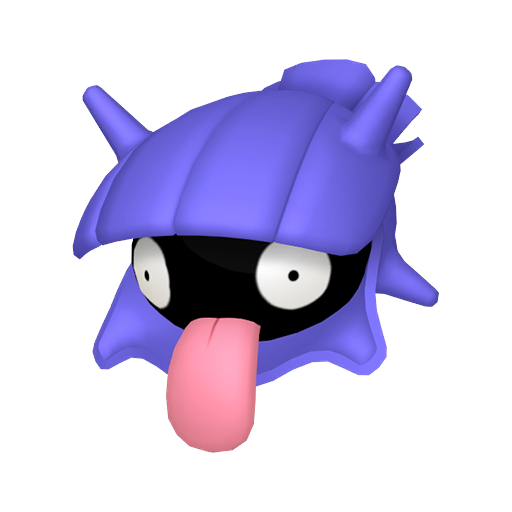
Its hard shell repels any kind of attack. It is vulnerable only when its shell is open.
The shell can withstand any attack. However, when it is open, the tender body is exposed.
It swims facing backward by open ing and closing its two-piece shell. It is surprisingly fast.
Grains of sand trapped in its shells mix with its body fluids to form beautiful pearls.
Clamping on to an opponent reveals its vulnerable parts, so it uses this move only as a last resort.
At night, this POKéMON uses its broad tongue to burrow a hole in the seafloor sand and then sleep in it. While it is sleeping, SHELLDER closes its shell, but leaves its tongue hanging out.
It is encased in a shell that is harder than diamond. Inside, however, it is surprisingly tender.
At night, it burrows a hole in the seafloor with its broad tongue to make a place to sleep. While asleep, it closes its shell, but leaves its tongue hanging out.
It swims backward by opening and closing its two shells. Its large tongue is always kept hanging out.
It swims facing backward by opening and closing its two-piece shell. It is surprisingly fast.
At night, this Pokémon uses its broad tongue to burrow a hole in the seafloor sand and then sleep in it. While it is sleeping, Shellder closes its shell, but leaves its tongue hanging out.
The hardness of its shell surpasses the hardness of a diamond. In days gone by, people used the shells to make shields.
This Pokémon’s tongue is always hanging out. It uses its tongue with great dexterity to dig up sand from the seabed in its search for food.
The sand that accumulates inside its shell eventually becomes a pearl. But the pearl gets in the way, so it spits it out and discards it.
Even when its shell is closed, its tongue still hangs out. If you give its tongue a good yank, the shock will cause Shellder to open its shell.
0 individuals recorded for this species.
No owned individuals are recorded yet.